Finger loom weaving is an ancient textile art, accessible to all, utilizing simple tools to create beautiful and functional pieces; a truly rewarding craft!
Beginners can quickly learn basic techniques, while experienced weavers explore complex patterns, all stemming from the fundamental over-under method.
This ancient practice offers a unique connection to textile history, blending creativity with a tangible link to past generations of artisans.
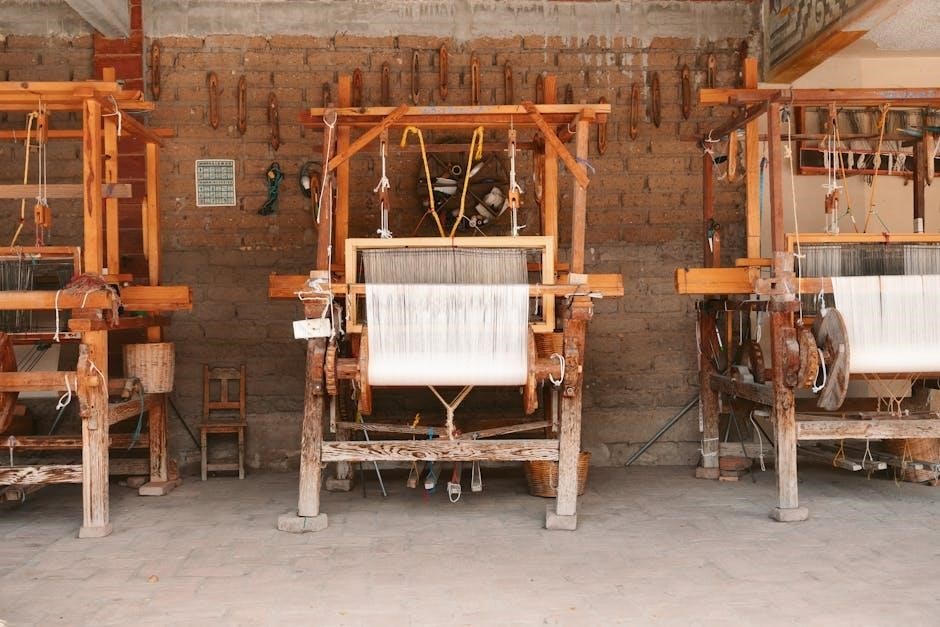
What is a Finger Loom?
A finger loom is a remarkably simple weaving device, traditionally constructed from a flat piece of wood or cardboard with evenly spaced pegs or notches.
These pegs serve as the foundational structure for warping the yarn, creating the necessary tension for weaving without the need for a complex loom setup.
Unlike traditional looms with multiple shafts and pedals, a finger loom relies on the weaver’s fingers to manipulate the warp threads, creating the interlacing pattern.
Essentially, it’s a portable and incredibly versatile tool, allowing for the creation of narrow fabrics like belts, bracelets, and straps, or even wider pieces through joining techniques.
Finger looms come in various sizes and can be easily handmade, making it an accessible craft for beginners and experienced weavers alike.
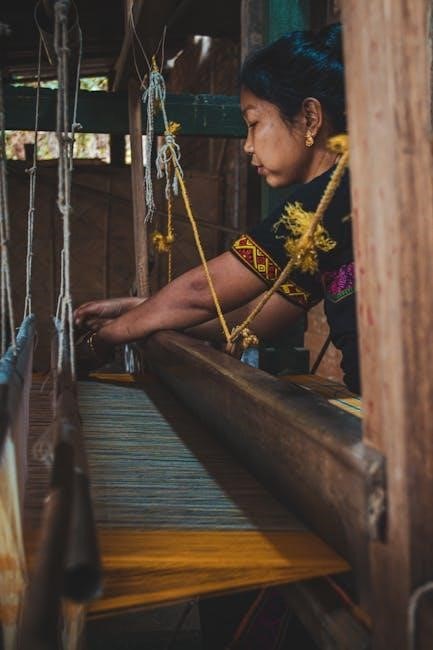
History and Origins of Finger Weaving
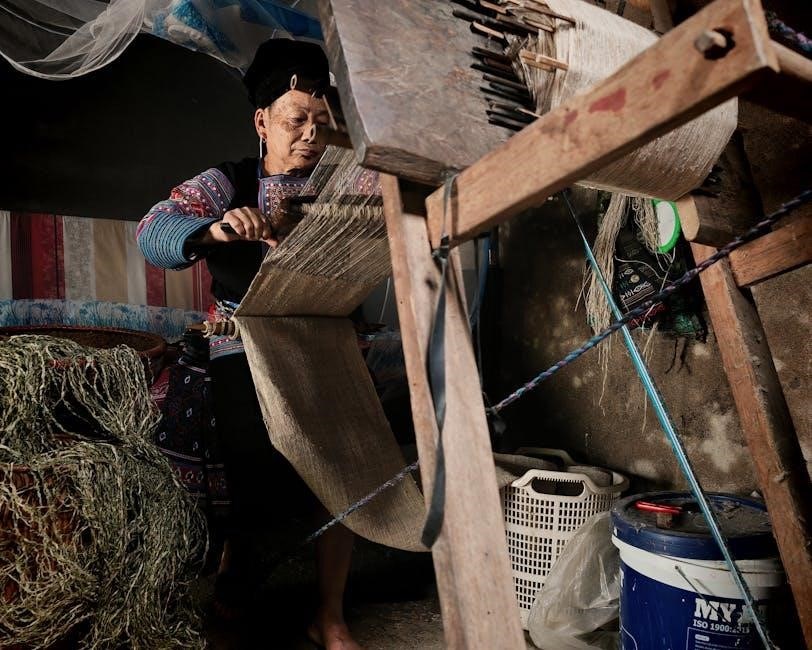
Finger weaving boasts a rich and ancient history, predating many complex loom technologies, with evidence found across numerous cultures worldwide.
Indigenous communities in North America, particularly the Métis people, developed highly sophisticated finger weaving traditions, creating intricate designs with deep cultural significance.
Archaeological discoveries suggest similar techniques were practiced in ancient Europe and Asia, used for creating textiles for clothing, accessories, and ceremonial purposes.
The simplicity of the method allowed for portability and accessibility, making it a widespread craft among nomadic and settled communities alike.
Over time, finger weaving evolved, with regional variations in patterns, materials, and techniques, showcasing the ingenuity and artistry of weavers throughout history.
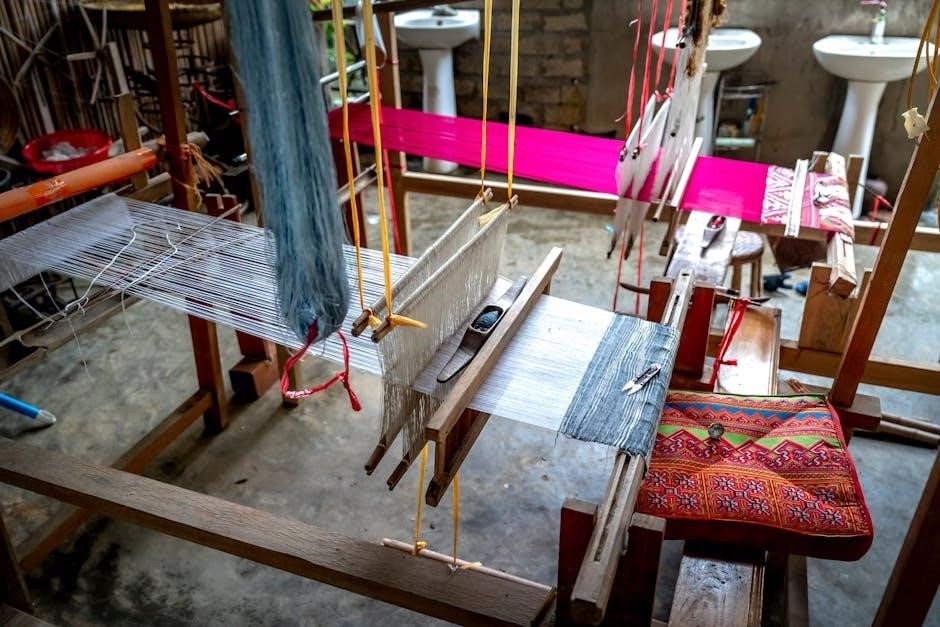
Materials Needed for Finger Loom Weaving
Essential materials include a finger loom (DIY or purchased), yarn of your choice, a tapestry needle for finishing, and scissors for clean yarn cuts.
Optional tools enhance the process, like pick-up sticks for texture and a loom comb for even weaving.
Types of Yarn Suitable for Finger Looms
Selecting the right yarn is crucial for successful finger loom weaving. Generally, worsted weight yarn is an excellent starting point, offering a good balance between thickness and manageability. However, a wide range of yarn types can be utilized, depending on the desired project and aesthetic.
Cotton yarn provides a sturdy and durable fabric, ideal for items like belts and bags. Wool yarns create warmer, softer textiles, perfect for scarves or wristbands. Acrylic yarns are a budget-friendly option, available in a vast array of colors.
Experimenting with different fibers, such as linen or blends, can add unique textures and visual interest to your woven pieces. Avoid extremely bulky or very fine yarns initially, as they can be challenging to work with on a finger loom.
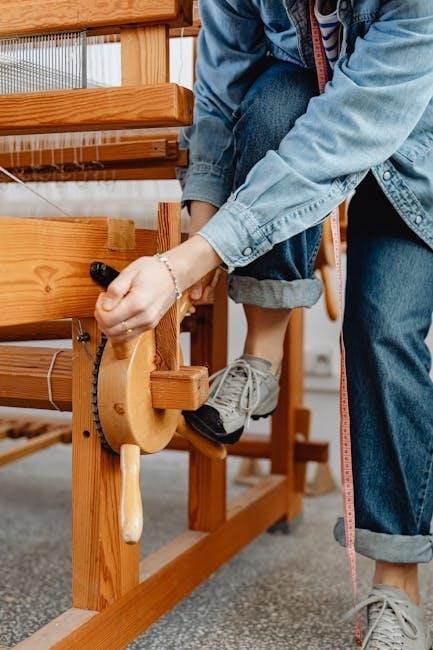
Finger Loom Construction Options (DIY vs. Purchased)
Finger looms are readily available for purchase or can be easily constructed at home. Pre-made looms, often made of wood or plastic, offer convenience and consistent peg spacing, simplifying the warping process. These are ideal for beginners seeking a hassle-free start.
However, crafting a DIY loom is a rewarding experience, allowing for customization in size and peg arrangement. Simple cardboard looms are a fantastic starting point, requiring minimal materials and effort.
More durable DIY looms can be built using wood and dowels. The choice depends on your budget, crafting skills, and desired level of control over the loom’s specifications.
Setting Up Your Finger Loom
Proper setup is crucial for successful weaving! Begin by securely warping the loom with yarn, ensuring consistent tension across all pegs for even fabric creation.
Maintaining even tension throughout the warping process prevents warping and ensures a beautiful, structurally sound final product.
Warping the Loom: A Step-by-Step Guide
Step 1: Secure the warp yarn’s end to one peg, leaving a tail for finishing. Step 2: Wrap the yarn around each peg, consistently moving in one direction – typically clockwise or counter-clockwise.
Step 3: Maintain even tension as you wrap; avoid pulling too tightly or leaving the yarn too loose. This is vital for a uniform weave. Step 4: Continue wrapping until you reach the desired length of your warp, considering shrinkage during weaving.
Step 5: Secure the yarn’s end to the final peg, again leaving a tail. Double-check that all pegs have an equal number of wraps and that the tension remains consistent throughout the entire warping process. A well-warped loom is the foundation for beautiful finger weaving!
Tension Control: Achieving Even Weaving
Maintaining consistent tension is paramount for successful finger loom weaving. Uneven tension results in distorted fabric and frustrating results. Gently pull the weft yarn as you weave, but avoid over-tightening, which can cause the warp threads to break.
Use your fingers to subtly adjust the tension of the warp threads as you work. If a section feels loose, gently nudge the pegs to tighten it. Regularly assess the overall tension across the loom’s width.
Practice makes perfect! With experience, you’ll develop a feel for the ideal tension. A balanced weave showcases even loops and a pleasing texture, demonstrating skillful tension control.

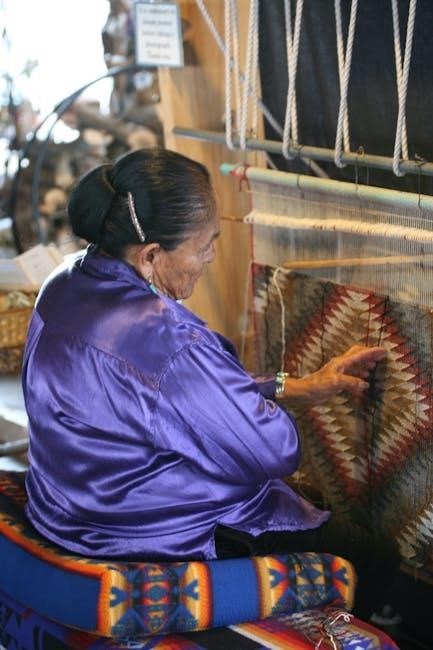
Basic Finger Weaving Techniques
Fundamental finger weaving centers around the simple “over-under” pattern, creating interlaced loops. Mastering this technique unlocks a world of possibilities for texture and design!
Begin by passing the weft yarn over and under the warp threads, repeating consistently to build your woven structure, row by row.
The Basic Weave: Over-Under Pattern
The core of finger loom weaving lies in the rhythmic “over-under” technique. Begin by securing your warp threads on the loom, ensuring even tension. Take your weft yarn and pass it over the first warp thread, then under the next, continuing this alternating pattern across the entire row.
On the return pass, reverse the pattern – if you went over a thread before, now go under it, and vice versa. This creates the interlacing that forms the woven fabric. Maintain consistent tension on the weft yarn as you weave, gently pushing each row into place.
Practice this simple sequence, and you’ll quickly establish a solid foundation for more complex patterns and designs. Remember to keep the edges neat and even for a polished finish!
Creating Different Stitch Patterns
Beyond the basic over-under weave, a world of stitch patterns awaits! Experiment with varying the number of warp threads the weft yarn passes over or under in a single pass. For example, try going over two, then under one, or creating diagonal lines by shifting the pattern each row;
Introduce color changes to highlight specific sections or create stripes and geometric designs. Utilizing different yarn weights and textures can also dramatically alter the fabric’s appearance.
Don’t be afraid to explore and invent your own unique combinations – the possibilities are truly endless! Careful planning and consistent execution are key to achieving intricate and visually appealing patterns.
Advanced Finger Loom Techniques
Elevate your weaving with pick-up sticks for textured designs and intricate patterns! Master weft floats and seamless color changes for stunning visual effects.
These techniques unlock complex designs, allowing for greater artistic expression and unique textile creations.
Pick-Up Sticks and Texture Creation
Pick-up sticks are essential for introducing texture and complex designs into your finger loom weaving. These tools, typically thin strips of wood or cardboard, allow you to selectively lift specific warp threads.
By lifting chosen warp threads, you create a shed – an opening – through which the weft yarn passes, resulting in patterns like diamonds, stripes, or more elaborate motifs. The size and placement of the pick-up sticks dictate the resulting texture.
Experiment with different stick widths and combinations to achieve varied effects. Carefully controlling which threads are lifted is key to precise pattern creation. This technique expands beyond simple over-under weaving, offering a pathway to truly unique and visually interesting textiles.
Weft Floats and Color Changes
Weft floats occur when the weft yarn travels over multiple warp threads on the surface of the weaving, creating a textured effect and visual interest. Controlled floats add a decorative element, while excessive floats can weaken the fabric.
Strategic color changes, combined with weft floats, unlock a world of design possibilities. By changing yarn colors mid-row, or incorporating them into float patterns, you can create striking geometric designs or pictorial motifs.
Experiment with different float lengths and color combinations to discover unique aesthetic effects. Secure floats periodically by weaving the weft under several warp threads to prevent unraveling and maintain structural integrity.
Finger Loom Projects
Finger loom weaving lends itself to diverse projects! Create colorful bracelets, sturdy belts, or even small bags and pouches with relative ease and speed.
These projects are excellent starting points for beginners, allowing them to practice techniques and build confidence in their weaving skills.
Weaving Bracelets
Finger loom bracelets are a fantastic entry point into the world of finger weaving, offering a quick and satisfying project for beginners. Begin by warping your loom with desired colors, ensuring even tension across all pegs.
The basic weave – an over-under pattern – forms the foundation of most bracelet designs. As you weave, gently pack the rows together to create a dense and durable fabric. Experiment with color changes to introduce stripes or geometric patterns.
Finishing involves securing the ends of the yarn and adding a closure, such as a braided loop and knotted ends, or a purchased clasp. Bracelets can be customized with beads or charms for added flair!
Creating Belts with a Finger Loom
Finger loom belts require a longer warp than bracelets, demanding patience and consistent tension. Warping involves wrapping yarn around all loom pegs, creating a substantial length for the desired belt size. Utilize sturdy yarn for durability, as belts endure more wear than bracelets.
Employ the basic over-under weave, diligently packing each row to achieve a firm, non-stretchy fabric. Explore variations by introducing different colors and patterns throughout the weaving process. Consider incorporating pick-up sticks for textured designs.
Finishing a belt involves securely fastening the ends and adding a buckle or creating a braided tie closure for a personalized touch.
Finger Loom Bags and Pouches
Finger loom bags and pouches necessitate weaving multiple panels, then joining them together. Begin by determining the desired size and shape, then warp the loom accordingly for each panel. Consistent tension is crucial for uniform panel dimensions.
Weave each panel using the over-under technique, experimenting with color changes and patterns to create visually appealing designs. Once all panels are complete, carefully join them using a sturdy yarn and a needle, employing a secure stitch.
Add straps or drawstrings to complete the bag or pouch, ensuring they are firmly attached for durability and functionality.
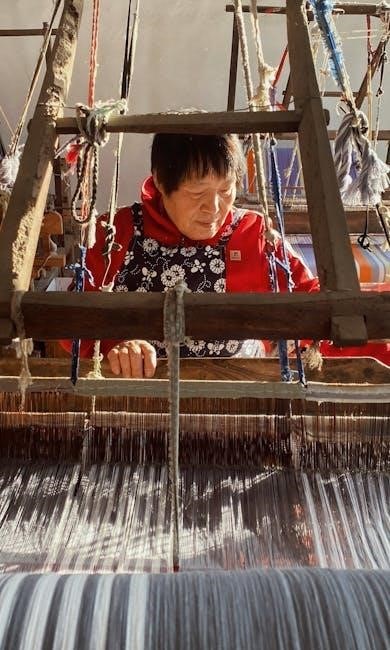
Métis Finger Weaving: A Specific Tradition
Métis finger weaving showcases vibrant floral designs and geometric patterns, traditionally used for sashes, embodying cultural stories and artistic expression through intricate techniques.
Unique Patterns and Techniques
Métis finger weaving distinguishes itself through distinctive patterns not commonly found in other finger weaving traditions. These often feature bold, symmetrical floral motifs representing prairie life and spiritual beliefs. A key technique involves creating weft floats – intentionally carrying the yarn across multiple warp threads – to produce striking visual effects and textural depth.
Color changes are integral, meticulously planned to define the floral elements and geometric borders. Unlike simpler over-under weaves, Métis weavers employ complex picking-up techniques, selectively lifting warp threads to create intricate designs. This requires exceptional skill and a deep understanding of the loom’s capabilities, resulting in truly unique and culturally significant textiles.
Cultural Significance of Métis Finger Weaving
Métis finger weaving holds profound cultural importance, representing a vital link to ancestral knowledge and identity. Historically, it was a crucial skill passed down through generations, particularly among women, creating essential items like sashes, blankets, and clothing. These weren’t merely functional objects; they were expressions of artistry, storytelling, and community belonging.
The floral designs often symbolize the prairie landscape and Métis connection to the land. The vibrant colors and intricate patterns communicated status, family history, and spiritual beliefs. Today, revitalizing this art form is a powerful act of cultural reclamation, preserving a unique heritage and fostering pride within the Métis Nation.
Troubleshooting Common Issues
Uneven tension and weaving mistakes are common! Gently adjust warp threads and carefully re-weave errors, securing ends to maintain pattern integrity and project quality.
Dealing with Uneven Tension
Maintaining consistent tension is crucial for a beautiful finger weaving project. If you notice areas pulling or becoming loose, don’t panic! Gently manipulate the warp threads, easing tension in tighter spots and carefully tightening those that are slack.
Avoid pulling too hard, as this can distort the weave. Regularly check tension as you work, making small adjustments frequently.
Sometimes, slightly dampening the yarn can help it settle and even out. Consistent, even tension results in a polished, professional-looking finished piece, so patience is key!
Remember to periodically assess the overall fabric structure, ensuring a uniform appearance throughout your weaving process.
Fixing Mistakes in Your Weave

Mistakes happen! Don’t be discouraged if you encounter errors in your finger weaving. For small errors, carefully use a tapestry needle to gently pull the weft yarn back through the warp, unraveling a few rows to correct the issue.
Avoid excessive pulling, which can damage the warp threads. If a larger section is incorrect, consider carefully cutting the weft yarn and re-weaving that portion.
Secure the ends of the re-woven section to prevent unraveling. Remember, imperfections can add character! Embrace them as part of the handmade process.
Practice makes perfect, and learning from mistakes is a valuable part of the weaving journey.
Resources and Further Learning
Expand your skills! Numerous online tutorials and videos demonstrate finger weaving techniques, while books offer in-depth knowledge and pattern inspiration.
Explore diverse resources to refine your craft and discover new creative possibilities within this rewarding textile art form.
Online Tutorials and Videos
Dive into the digital world of finger loom weaving! Platforms like YouTube host a wealth of free tutorials, showcasing everything from basic warping to advanced pattern creation. Search for “finger loom weaving tutorial” or “Métis finger weaving” to uncover a diverse range of instructional videos.
These visual guides are invaluable for beginners, allowing you to observe techniques firsthand and learn at your own pace. Many instructors break down complex steps into easily digestible segments, making the learning process more accessible. Look for channels demonstrating specific projects, like bracelet weaving or bag construction, to gain practical experience. Don’t hesitate to pause, rewind, and re-watch sections as needed to fully grasp the concepts. Online resources truly democratize this ancient craft!
Books and Publications on Finger Weaving
Expand your knowledge beyond the screen with dedicated finger weaving literature! While resources are growing, seeking out published materials offers in-depth exploration of techniques and historical context. Look for books specifically focusing on finger weaving, or those covering broader topics like traditional textile arts that include sections on this craft.
Publications often provide detailed diagrams, pattern instructions, and insights into the cultural significance of finger weaving, particularly within Métis traditions. These resources can be invaluable for serious students of the craft, offering a more comprehensive understanding than online tutorials alone. Check library catalogs and online booksellers for available titles, and consider joining weaving communities for recommendations.